DSLR HD Camera blurry photos? Try these fixes in order
I’ll help you separate a capture problem from an added blur effect, so you can get a clear photo before the next shot matters.
Aaron HaleReviewer · published Oct 25, 2026 · 6 min read
01The preview is sharp, but the saved photo is blurry
I frame a close-up of beauty products, tap the shutter, and find that the saved image looks softer than the preview. Before changing resolution, I check where the blur appeared. Open the photo in the phone’s gallery and compare it with the live camera preview of the same subject. A sharp preview followed by a blurred saved photo points me toward an effect or edit; a blurry preview points toward focus, movement or the lens.
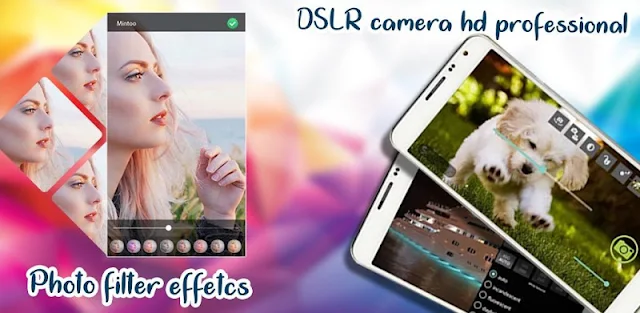
DSLR HD Camera includes filters and a blur editor, so I treat those as the first likely cause when blur appears after capture. Next come a missed focus point, too little light for a steady shot, digital zoom and a marked lens. Camera access or an app fault becomes more likely if the preview is black, frozen or unavailable rather than merely soft. That distinction keeps the first fixes quick.
I use one plain subject and take a fresh photo after each change. Comparing a newly captured image matters: changing an effect may not undo blur already applied to an older picture. If the fresh shot is still soft, the next check is the one that takes only a tap.
02First, rule out blur effects and focus on the subject
Start a fresh capture without selecting a filter, template or blur effect. If you are editing an existing photo, look for an option to remove or reset the applied effect before saving another copy. I keep edits separate from the original when I can; otherwise, an outfit ideas photo that was intentionally softened can look like a camera problem later.
For a new shot, tap the part that must be sharp in the camera preview, then hold the phone still as you press the shutter. I tap an eye for a face shot or a label for a product shot—not the background. If the subject is extremely close, move the phone back a little and tap again. The camera may need more distance to focus than the composition suggests.
Now compare the fresh photo with the preview. If the subject is sharp and only the background is soft, check whether a blur effect is active before changing anything else. If the whole frame still looks smeared, especially around edges or text, move on to light and zoom; they can defeat a good focus tap.
03Then fix the two conditions that make focus look broken
Move into brighter, even light and take the same photo again. I would turn the subject toward a window rather than put a bright window behind it. In low light, movement during capture can soften the whole image, while a bright background can leave the subject harder to see. Resting the phone on a stable surface and using the app’s timer can also remove the small shake from pressing the shutter.
Set zoom back to its normal view and move closer with your feet if space allows. Zooming in on a phone can make hand movement more obvious and leave fine details looking less clean. For a skincare routine photo, I would compare the print on a bottle at normal view before trying a tighter frame. That makes it easier to tell blur from text that is simply too small.
Wipe the camera lens gently with a clean, soft cloth, then test both the front and rear cameras using the app’s camera switch. A fingerprint can make bright areas hazy; comparing cameras helps narrow down whether the trouble follows one lens. If one camera is clear and the other is not, keep that result in mind for the settings check.
04Check resolution only after a plain shot is sharp
DSLR HD Camera offers adjustable resolution, but resolution is not a focus control. A higher setting cannot restore detail lost to movement, a dirty lens or an applied blur effect. Once a plain, well-lit shot is sharp, open the app’s camera settings and check the photo resolution option. Choose an available setting suited to the detail you need, then capture a new comparison photo.
Keep the comparison fair: use the same camera, subject, distance and lighting. I would look at lettering on beauty products rather than judge sharpness from a bright patch of wall. Also view both photos at a similar size in the gallery. Enlarging one much farther than the other can make the resolution change look like a new blur problem.
If you changed color effects, white balance, scene mode or exposure compensation while troubleshooting, return to a plain-looking setup for the next shot. Those controls affect appearance, and several changes at once make the cause hard to spot. If the preview is unstable or the shutter is not behaving normally, leave image settings alone and check the phone’s app controls next.
05If the camera misbehaves, check Android access and cache
A black preview, a frozen viewfinder or a shutter that will not produce a photo is a different problem from soft focus. I check camera access first because it is quick and reversible. Android menu wording varies by phone, but the usual route starts in Settings. Close DSLR HD Camera before reopening it after a permission change.
Use this order, stopping as soon as a fresh capture works:
Open Settings > Apps > DSLR HD Camera : 4K HD Camera > Permissions.
Tap Camera and choose Allow while using the app, if camera access is off.
Return to App info > Storage & cache > Clear cache.
Reopen the app and take one plain photo in good light.
Clear cache removes temporary app files, not the photos in your gallery. I would avoid Clear storage or Clear data at this stage because those options can reset app settings. If the app opens but only one camera fails, compare that camera in the phone’s built-in Camera app. That tells you whether to keep investigating DSLR HD Camera or check the phone’s camera itself.
06Still blurry? Isolate the app before starting over
Take a photo of the same stationary subject in the phone’s built-in Camera app, from roughly the same distance and in the same light. If both apps produce soft images with the same camera, revisit the lens, focus distance and lighting before changing DSLR HD Camera again. If the built-in Camera photo is sharp, return to DSLR HD Camera and repeat a plain capture without edits or zoom.
If the problem stays within DSLR HD Camera, restart the phone and reopen the app. Then open its Google Play listing to check for an available app update; the developer’s update notes refer to a Templates feature, so I would still judge the result by a new unedited photo rather than assume a template changes capture quality. Keep any photo you want in your gallery before taking more disruptive steps.
Reinstalling is my last step, not my first. Check that photos you want to keep are accessible in your gallery, then remove the app and get it from Google Play again. Recheck camera permission when it opens, and make the first test a plain shot. If that shot is clear, add your preferred effects back one at a time so the source of any renewed blur is easier to identify.
The takeaway
First, take a new photo with no blur effect or zoom, tap the subject to focus, and compare it with the preview. Change light and steady the phone before changing resolution or app data.
Continue to this site’s DSLR HD Camera page just below for the app’s features and store details.
Past The First Look is independent and not affiliated with DOSA Apps. This guide reflects the reviewer's own setup; menus can differ by device and version.

 TroubleshootingAI Piano Magic Keyboard

 TroubleshootingGroupon

 TipsWalmart

 CompareKohl's

 How-toDSW Designer Shoe

 TipsSoccer Live Scores

 Best picksIXL

 How-toGmail
 How-toSamsara Driver

 CompareJewel-Osco Deals &

 TipsAppSales